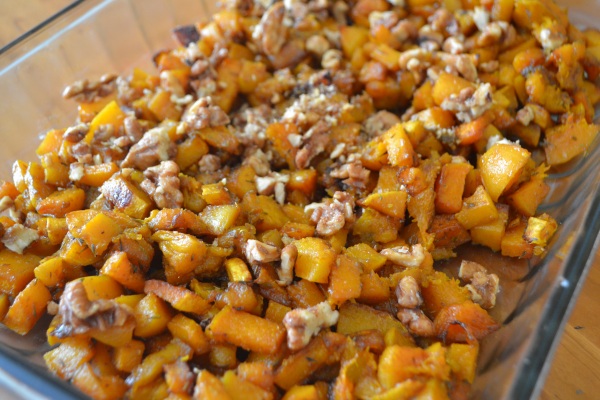
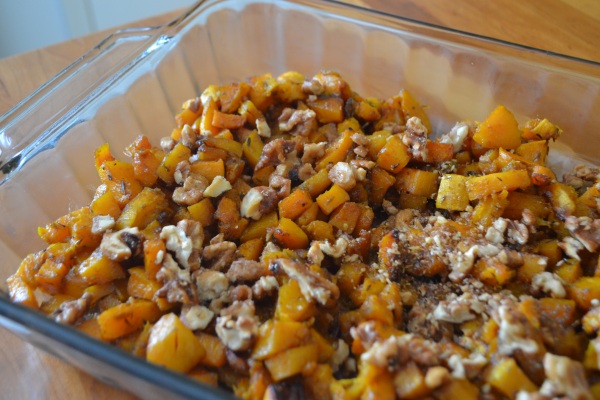
Spicy-Sweet Roasted Butternut Squash
Current mood = this super-catchy Bollywood song that I am OBSESSED with right now. Ahhh! Turn the volume up and dance! Carefree / bold / emotional / fearless / goofy / jumpy.
And to extend my current mood, this dish has all the makings of a last-minute recipe idea. It has ingredients that can be easily found at any store, a method that is literally chop > season > roast > garnish (with candied walnuts!) > serve, and flavors that make it a melange of quintessential autumn-y, bold, yet warming & comforting notes that at the same time, never over-power any main dish you’d couple it with. With brown sugar and cumin powder as some of the seasonings, I love that the spices I used are a fun blend of Indian and typically non-Indian flavors.
Make it a topping to your not-so-boring desk lunch salad OR… make it a punchy side-dish to your upcoming Thanksgiving feast, or potluck dinner party! Invited to your to-be mom-in-law’s house and you want to impress her? Bring this dish. Invited to potluck with your new set of friends? Bring this dish. Invited to your boyfriend’s gracious and welcoming friends’ home? Bring. this. dish!
Ok. Enough selling. Here’s my easy recipe. Make it and tell me if you like it as much as I do! (Serves about 8-10 people as a side dish)
You will need:
- 2 medium-large butternut squash
- 4 tbsp good quality extra-virgin Olive Oil. I used some trippy garlic-infused oil from Mr. Trader Joes
- Salt to taste
- 1 tablespoon light brown sugar
- 1 tsp dried thyme (my new fave herb)
- 1 tbsp cumin powder
- 1 tbsp coriander or cilantro seed powder
- Flavored walnuts to garnish – chopped roughly
- This is my favorite – 1 tsp La Chinata smoked Paprika powder. Or, you can use regular paprika powder, or chili powder. Either will do.
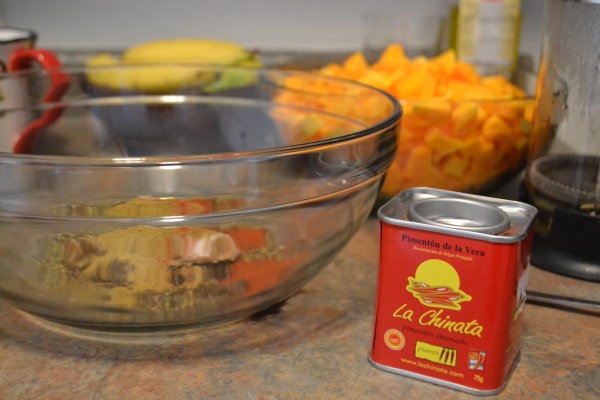
La Chinata paprika powder is THE BEST purchase I made at my recent trip to Spain. The paprika is the highest quality and the smoky flavor has amped up all my dishes lately. Yum! Unfortunately they don’t export to the States but I have enough of a stash to last me before my next trip to Europe.
The Method
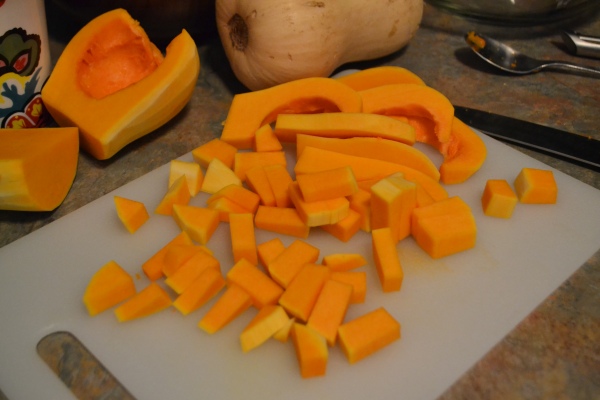
Set the oven to pre-heat at 375F. Use your biceps, triceps and forearms well to clean, peel, then chop the Butternut squash in 2 inch cubes with a good sharp knife. If the idea of cutting up a squash stresses you, get the already chopped up variety from the store. I usually find them too small-cut, so I prefer doing my own prep.
Nifty tip: After cutting the squash in manageable chunks, I pop them in the microwave for upto 2 mins. This softens them and makes them easier to peel. Make sure you let the squash cool before handling!
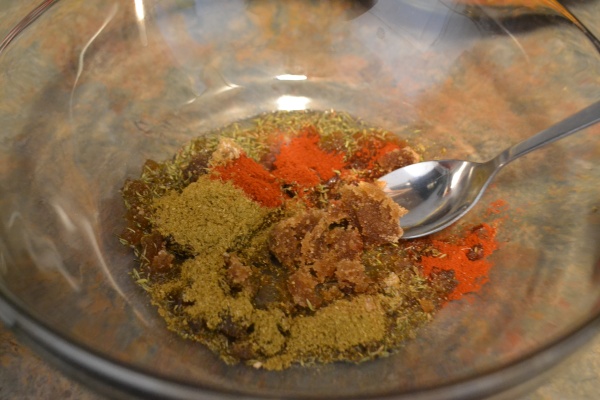
In a large bowl, add all the olive oil, spices and seasonings, and mix well. Then pop all the chopped squash in it, get your hands in, and mix everything really well to make sure every piece is coated with the oil and spice mixture.
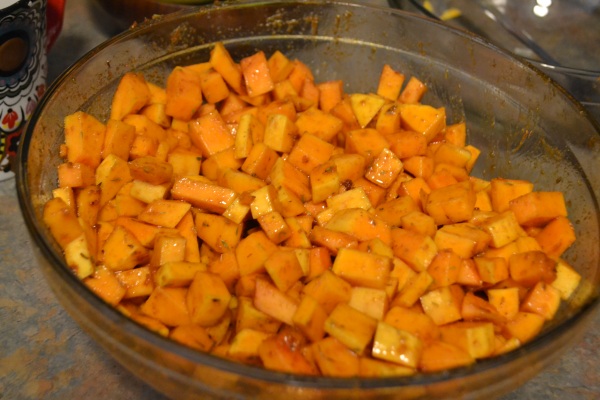
Prep a large baking sheet and line it with aluminum foil. Spread the squash evenly, without crowding the pieces. Use another tray if needed. Then bake in the 375F oven for 30 mins or until all the squash is cooked. If you like yours more crunchy, continue to bake on 400F for another 5 mins to get a golden-brown color.

Empty the cooked squash into a serving dish. Then garnish with any spicy or lightly candied walnuts. I used the lightly flavored walnuts from Trader Joes. Serve and enjoy!
Spicy Chicken Tacos with spiced Corn and Yogurt toppings

Behold the Chicken Taco… mmmmm
Look at that. A warm, freshly prepared, spicy, yummy, piled-with-tons-o-flavor Chicken Taco. Isn’t she lovely? Did I just give this taco a gender? I ate her. And another of her folk. And another later that day.
I came up with this recipe when I invited my sister and her family over recently for lunch. The occasion? My fabulous new digs! I wanted to show off my new place in Saint Paul to the people who matter most, and in my typical I-want-to-impress-my-sister style, I scoured Pinterest for new recipes I could impress the sistah with. Despite my well-intended planning, I missed getting the groceries beforehand, and scrambled to get what I could find at Trader Joe’s the day of.

Not finding everything for a Chicken Taco recipe I originally wanted to make, actually worked out really well! For starters, I found this epic Taco seasoning spice packet at Joe’s. The packet calls for adding it to mince meat for a taco, but I used it as a meat rub for the chicken. One half packet for 4 chicken breasts was a good ratio. I also loved how the chicken browned and seared in the pan because of the seasoning, adding this nice char that I like so much,
I also managed to make the taco low-fat by using no cheese, a spiced greek yogurt topping instead of sour cream, and a yummy no-oil corn relish that I spiked with some Indian masalas. Glee to the mouth, I say! The multiple textures made for a delicious and satisfying meal.

The recipe needs a few different steps, but with some simple multi-tasking, you can easily prepare it in a little over an hour.
For 4 people, you will need:
- Corn or wheat tortillas per your liking
- 3-4 Boneless Skinless Chicken breasts
- 1 packet Trader Joe’s Taco Seasoning Mix
- Assorted veggies, julienne – I used red peppers, yellow peppers, zucchini and mushroom
- 1 cup no-fat Greek yogurt
- 1 can or 1 cup of fresh sweet corn kernels
- 1 bunch cilantro
- Spices and dried herbs: oregano, chili powder, cumin powder, black pepper powder
- Salt to taste
- Limes
- Vegetable or Olive oil for cooking
Make the Chicken
- Clean and wash the chicken breasts. Pat dry. Place in a large bowl with 1/2 a pack of the Taco seasoning, and mix well with your hands. Make sure you get the spice over all the chicken. Set aside.
- Heat vegetable oil in a non-stick pan, and on medium-high heat, place each chicken breast in the pan, giving each piece enough room in the pan
- Once the chicken is seared from one side, flip over, allow to sear, then lower the hear to low-medium, cover with a lid, and let the chicken breast cook through – 7-8 minutes.
- After the chicken is cooked, place it on a chopping board and slice or cube it for the tacos. Place back in the pan and cover with a lid to keep warm

Prepare the toppings
- For the corn relish, place the sweet corn, a handful (5-6 springs) of chopped cilantro, 1/2 tsp of cumin powder, 1/2 tsp chili powder, juice of 1/2 lime, and salt to taste. Mix well.
- For the yogurt topping, Mix the yogurt, a handful of cilantro (or, to taste. I like a lot.), juice of 1/4 lime, a pinch of salt, a large pinch of black pepper, and 4-5 tbsp water. The consistency should be that of something a little more fluid than sour cream


You could serve the taco as is, with the chicken and toppings. However I wanted to add some more crunch and sauteed a whole bunch of vegetables in olive oil, salt, pepper and oregano.

And that’s it! Now it’s time to serve. Wrap up your tortillas in a clean kitchen towel, and microwave for 30 seconds. Serve fresh with all the components, and enjoy!

Egg Bhurjee – Spiced scrambled eggs, Bombay style

A view of downtown Minneapolis from the St. Anthony Main neighborhood.
Spring is here in it’s full leafy, fragrance-of-the-grass, sunny glory here in Minneapolis, and everyday I walk out of my home and marvel at the fresh air, the sound of birds chirping, and the cool (not freezing) breeze on my face. Spring has this quality of making me feel refreshed and renewed every year. The long winter here makes me crave for this season and I cannot believe it is finally here!
Spring also, at least for the last couple years, makes me introspective about how far I’ve come. Perhaps the new buds and leaves on the trees remind me about the progression and growth of life. And my own progression. It is co-incidental because this May marks 3 years since I’ve been divorced. When I sat down one evening a few days ago in my little red armchair in my apartment, I had a smile on my face as I reflected on my experiences these 3 years. How much have I done, and seen and experienced! And I know that I would have never, ever experienced these things, with the energy, honesty, openness and joy that I did, if I was married to the person I was. In so many ways I am thankful I experienced what I did. And thankful to him. It was meant to be, and only in feeling like I had nothing, like I was incapable of having or feeling anything, was I driven and motivated to accomplish, feel, accept, be strong, defy, exert, experience, celebrate, express, and be the person I’ve always wanted to be on the path of becoming. It is an incomparable feeling that I am so grateful for finally acknowledging.

Celebrations!
And so, I celebrated last weekend with a few friends. And we did what we do best. Get goofy, make jokes we shouldn’t, stay out too late and laugh too much. (PS. The shrimp steamed buns at Moto-I are fab!!).
After a night of indulgence, I needed something fortifying in the morning. And what better occasion to make it than Mother’s Day, for a dear friend and mom! I had her over for breakfast and decided to treat her to my favorite style of eggs – Bhurjee, Bombay style.

Egg bhurjee – Spiced scrambled eggs
Bhurjee, to the best of my knowledge is a breakfast preparation that originated on the street food stalls of Bombay. The low-cost eggs, coupled with a few simple vegetables and spices, makes a satisfying and inexpensive meal for laborers and office-goers in Bombay. I remember going to one such street stall for a late night meal after several hours of partying when I was in college (shhh… don’t tell mom I did this 😉 ). It is all together, warming and completely satisfying. Coupled with hot charred pieces of bread, standing by Marine Drive, with the smell of salt in the air, bhurjee can feel like an adrenalin shot when one is tired.
Make it this weekend for breakfast! My recipe is ensures soft, creamy eggs with a good kick. Follow my recipe and you will not be disappointed! Here it is:
Serves 3
You will need:
- 5 eggs
- 2 tbsp milk
- 1/2 medium sized white onion, chopped
- 1 medium sized tomato, chopped
- 1/2 tsp chili powder
- 1 tsp Dhania-Zeera powder (Cumin-Coriander)
- 3 tbsp olive oil
- Salt to taste
- Black pepper and a handful of chopped cilantro for garnishing

Method:
- Crack open the eggs in a bowl and beat very well with the milk.
- In a non-stick pan, heat the olive oil and sautée the onion on medium heat until slightly brown and translucent. Then add the tomatoes and cook until softened.
- Add all the spices except for the black pepper, and salt. Mix well, and slowly pour in the egg mixture.
- Turn heat to medium-low. With a spatula, keep separating the cooked egg from the bottom of the pan and keep enveloping it in the raw egg. Make sure you keep the heat to medium-low to ensure soft eggs.
- Once cooked, turn off heat and mix in a sprinkling of black pepper, and the chopped cilantro leaves.
- Serve immediately with hot buttered toast or charred buttered bread.

